Showing posts with label Breads. Show all posts

3.15.2014

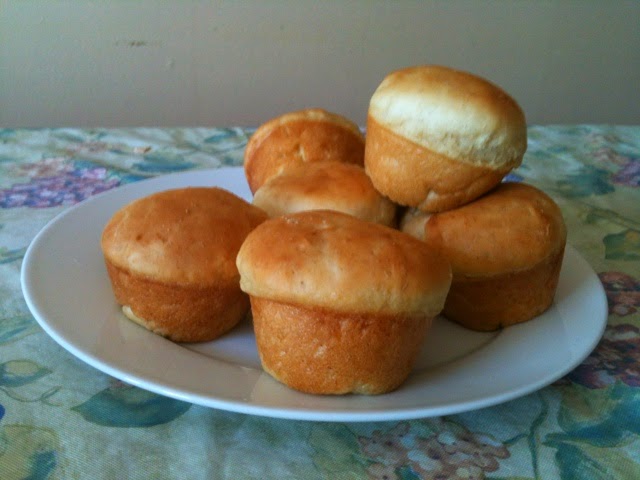
Vegan Hawaiian Rolls

2 Packets Active Dry Yeast or 4 1/2 teaspoons
1/3 Cup Sugar
2 teaspoons Sea Salt
1 teaspoon White Pepper
4 Cups Unbleached All Purpose Flour
3 Tablespoons Vegan Butter
1 1/4 Cups Coconut Water
Olive Oil Baking Spray
Muffin Tin

Add all ingredients to bread machine and set dough cycle.  Preheat oven to 350 degrees F.  When dough cycle is finished form loose balls of dough and place in muffin tin sprayed generously with Olive Oil baking spray.  Cover loosely with a lint free towel and allow to rise 45 minutes or intil doubled in size.  Bake for 15 minutes and allow to cool for 5 minutes in pan.  Remove from tin and serve immediately.


11.27.2013

Sourdough Heaven

My pants may fit tighter but my holiday is brighter for the Sourdough God is alive and well on my kitchen table.  From my Family to Yours - Happy Thanksgiving!  May you be blessed with the bounty that is the Gift of Life and the Greatness of San Francisco Sourdough....


11.06.2013

Roasted Garlic and Herb San Francisco Sourdough

3 1/2 Cups Bread Flour
1 Cup Sourdough Starter
1 Cup Warm Water
2 teaspoons Sea Salt
1 Tablespoon Sugar
1 teaspoon Oregano
1/2 teaspoon Basil
1/2 teaspoon Marjoram
1/2 teaspoon Black Pepper
12 Cloves Fresh Garlic
Olive Oil for coating pan
Cornmeal for dusting pan

Add all ingredients except olive oil and cornmeal to bread machine and set to "Dough" cycle or mix by hand and knead for 10-15 minutes on a flour dusted surface.  Place dough in a well oiled, cornmeal dusted ceramic pot that has a lid or use a glass pie plate and wrap tighly top to bottom with saran wrap.  Place in fridge overnight or for at least 8 hours.  Remove pan from fridge, remove saran wrap or lid (if ceramic pot has one) and place on counter covered with a lint-free lightweight dish cloth.  Allow to rest covered for another 8 hours or until loaf has doubled in size.  Remove towel and make three slits in top of dough.  Place in  cold oven and turn on oven to 425 degrees F.  Cook for about 30-35 minutes until crust turns deep golden brown.  For a glossy top, brush with additional olive oil during last 5 minutes of cooking.  When bread is finished cooking, carefully transfer to a wire rack and allow to cool for at least 30 minutes before slicing.

Chef's note: For a chewier crust you can bake bread for first 20 minutes covered with ceramic pot lid or tinfoil.  Alternately or, in addition, you can create steam in your oven by pouring water directly on the oven floor and/or putting a dish of 2 inches of water underneath bread while it bakes.  Although covering and steaming are not required, they can noticeably alter the texture and look of the finished product creating a more chewy restaurant-style rustic loaf.


11.03.2013

Adventures In Sourdough...

I adore eating bread and while it may not adore me back, because of the pounds I pack on just looking at it, I make it anyway every so often.  This all changed a week ago when I embarked on making my own Sourdough Starter.  Now I'm baking bread every day, sometimes twice.  I guess I really do live in San Francisco after all and can officially call this my home now that I am baking it's signature bread.  I've lived here for almost fifteen years, but now I think I really belong here.  LOL.  I guess I'm storing up for the winter, or something like that.

Just the smell of freshly baked bread has got to be one of the most luxurious things in life.  I plan on doing various bread installments on my blog because this sourdough starter is gifting us over and over and I have some amazing recipe ideas using different flours, herbs and aromatics.  Just please don't ask me for a gluten-free version.  I don't have one.  I'm sure it exists, I just have not gone there, yet.  I'm pretty sure my kitchen is made of wild yeasts and gluten at the moment.  The basic go-to recipe for the last few loaves of sourdough I have made is as follows:

Basic Sourdough Recipe
3 1/2 Cups+ Unbleached Bread Flour
1 Cup Sourdough Starter (I made my own in this case and feed it twice a day a combination of whole grain wheat, dark rye and white wheat flours)
3/4 Cup Warm Water
2 teaspoons Sea Salt
1 teaspoon Sugar

Each loaf gets prettier and tastier!  I am very excited about this new skill.  Stay tuned for stories, tips and more recipes!  Happy Baking!
Fourth Loaf, used starter and basic recipe (see above) baked in deep glass pie dish and made pretty design, SUCCESS

Third loaf, used starter only added Garlic and Italian Herbs, cooked it in a deep pie dish, SUCCESS and getting prettier

Second Loaf, not as pretty as I was going for but used starter only and waited 4 hours for a rise, SUCCESS, Delicious

First Loaf, I added my lovely starter and commercial yeast out of impatience (big mistake) tasted just like beer, FAIL


10.30.2013

Sordough Starter Day 6

Well I am pretty confident that both of my starters are still alive.  I decided to add a combo of 3 flours, whole wheat, dark rye and white bread flour.  I have also been dumping out half the starter as needed.  There are bubbles forming and both starters have a nice fermented aroma.  I will keep you updated and am so looking forward to making my first loaf of sourdough.  Happy Hump Day Universe. Let all great things come to those who wait!


10.26.2013

Sourdough Starter Day 3

Alright folks I have been feeding my sourdough starter twice a day and I also started one using just whole wheat flour instead of a combination of wheat and dark rye.  On day one I fed them equal parts of whole wheat flour and water (about 1/2 cup each).  Now, today, day 3 I fed them both unbleached white bread flour.  They are both covered on top of my fridge and getting bubbly and fermenting.  I am so looking forward to making some delicious, rustic sourdough breads but for now, the wait is on!  Stay tuned beloved readers.  This one should be well worth the wait!!!


10.24.2013

My First Sourdough Starter

Alright beloved readers, this is going to be an ongoing post that I will update as I discover my successes and failures on my adventures in making My First Sourdough Starter.  Who doesn't adore sourdough bread?  Here in San Francisco we are known for our Sourdough Bread.  I have often flirted with the idea of making my own sourdough starter but have never done it.  Today that is all going to change as I embark on the challenge.  I researched some recipes online but decided I would be experimental from the get go as I so often am on my culinary adventures.  Let the games begin!

I will post pictures after the first 24 hours so you can see what I'm working with.  Stay Tuned.

Sourdough Starter Recipe as follows (so far):
1/2 cup whole wheat flour
1/2 cup whole grain dark rye flour
1/2 cup plus 2 Tablespoons bottled spring water

I combined the flours and water and put them in a large stainless steel stock pot that is now basically covered (the lid has a small steam hole in it and I put a dishtowel on top).  I have the pot sitting on top of my refrigerator.  My understanding is the temperature level should stay somewhat consistent and ideally be over 70 degrees F.  In my poorly insulated home in San Francisco, 70 degrees F this time of year is a tall order but I'm hoping by putting the concoction on top of the fridge, the temperature will remain somewhat consistent.  We shall see.  I have set a reminder to myself to start "feeding" the starter 24 hours from now and twice a day, roughly 12 hours apart, from this point forward for at least a week before using the starter.

PLEASE NOTE:  My inspiration for this recipe came from the following recipe and website: http://www.kingarthurflour.com/blog/2012/04/05/creating-your-own-sourdough-starter-the-path-to-great-bread/


Bread Machine French Bread

Do you have a bread machine?  Do you use it?  I use mine all the time because it makes making homemade bread so EASY!  I makes homemade rolls, pizza crust, pita bread and more.  Today I am tackling a basic french bread recipe.

The inspiration for this recipe came after watching an episode of Top Chef New Orleans where the teams were charged with cooking Vietnamese cuisine.  Great episode that left me drooling for some crusty french bread drenched in butter.

Upon researching a recipe for Banh Mi Tay, I discovered this gem of a site -http://www.vietworldkitchen.com/blog/2007/05/vietnamese_bagu.html
I decided to give the recipe a go in my bread machine and see how it came out.  Although I don't mind making my own "loaves" I figured I'd let the bread machine do all the work today.

Bread Machine French Bread - (Vietnamese Baguette Recipe borrowed and adapted from http://www.vietworldkitchen.com blog, see link above)

1 1/2 cups warm water
1 package active dry yeast (or 2 1/4 teaspoons active dry yeast)
1 Tablespoon granulated sugar
3 1/2 cups unbleached bread flour (or all-purpose)
1 1/2 teaspoons sea salt

Add all ingredients to bread machine in the order listed (or according to your bread machine recommendations and set for basic bread cycle.  Remove when cooking cycle completes and allow to cool uncovered for at least an hour before slicing.  If you try to slice bread when it is hot/too warm, you will end up crushing the beautiful masterpiece you have just created so have a little patience.  I promise it will be worth the wait!  Serve toasted with lots of vegan butter.

Chef's note:  If you prefer to form your own loaves, set bread machine for "dough" and remove and form your own loaves to bake in your oven.  After forming two loaves, allow loaves to rise covered with a tea towel for 40 minutes.  Cut three slits in loaves (not just pretty but allow steam to escape) and bake at 450 degrees F for about 25 minutes.  Cooking times may vary based on your oven and size of your loaves.  Be sure to let bread cool to room temperature before slicing so you don't end up with a gummy mess.


8.09.2013

Cinnamon Buns

Dough
1 1/4 cups vanilla soy milk (heat 1 minute in microwave, should be luke warm, not hot)
1/4 cup vegan butter
1/4 cup canola oil
1 teaspoon salt 
1/2 teaspoon baking powder
1/2 cup sugar 
2 Tablespoons vegenaise (vegan mayo)
4 1/2 cups unbleached flour
1 packet active dry yeast (or 2 1/4 teaspoons)

Filling
1/2 cup vegan butter (melted)
3/4 cup brown sugar (not packed)
1 1/2 Tablespoons ground cinnamon

Simple Glaze
2 cups powdered sugar
1 Tablespoons vegan milk
1 teaspoon vegan butter
Dash of sea salt
-combine icing ingredients thoroughly and warm in saucepan or microwave for 30 seconds-

Add yeast and soy milk to bread machine.  Add remaining ingredients (add salt last) and set machine to dough cycle.  When cycle is complete, remove dough and place on large flour-dusted surface.  Roll out into a large rectangle about 1/8 inch thick.

Spread melted butter over entire surface.  Sprinkle generously with brown sugar and cinnamon.  Carefully roll rectangle up into a jelly roll and pinch edges together.  Using a serrated knife, slice gently in to 2 inch circles.  Grease generously a large casserole dish with vegan shortening.  Set rolls in pan with 1/4 inch in between. You may need to do two batches.  

Cover dish with thin towel or saran wrap and allow to sit on counter for 45 minutes.  Preheat oven to 350 degrees F.  Remove cover and bake for 25-30 minutes or until edges are golden.  Allow to cool slightly and then drizzle glaze over rolls in pan and serve warm.  Store unused portion in dish covered tightly on countertop.


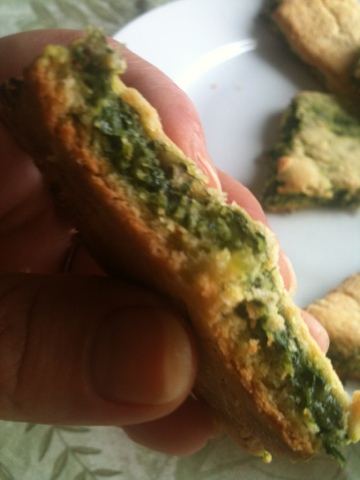
Spinach Stuffed Sweet Potato Scones

Scone Dough
1 1/4 cups unbleached flour
4 teaspoons baking powder
2 Tablespoons sugar
1 teaspoon sea salt
3/4 cup (precooked and mashed) sweet potato
1/4 cup vegan butter
2-4 Tablespoons vegan milk
Additional flour for dusting and rolling dough

Scone Filling
9 ounces fresh baby spinach
1 small sweet yellow onion
3 cloves garlic
1/2 teaspoon dried marjoram
1 teaspoon oil 
1 teaspoon vegan butter
Salt and Pepper (to taste)

Preheat oven to 425 degrees F.  Begin by making your dough. You can do this by hand or save some time and put that food processor to use.  Place flour, baking powder, sugar and salt in food processor and pulse to combine.  Add potatoes and pulse a few more times.  Repeat step with butter pulsing until mixture is fully combined.  Add about 2-4 Tablespoons (1 at a time) of vegan milk and pulse a couple more times until soft dough forms.  DO NOT OVER MIX or you will have a very tough scone.  Remove dough, wrap in saran wrap and place in fridge while you prepare filling.

Finely chop onion, garlic and spinach (or use that food processor again). Saute mixture in oil and vegan butter until cooked through.  Add marjoram, salt and pepper to taste.  Turn off heat.  Feel free to add any other spices you like at this point.  For example dill and oregano are delicious.  Just make sure it is seasoned well.  Remove filling from pan and place in cheesecloth or in a fine mesh seive over a larger bowl.  Press mixture using back of spoon (or squeeze cheese cloth) to remove as much of liquid as possible.  Let mixture sit and cool slightly while you work on the dough.

Remove dough from fridge and turn out onto a floured surface.  Roll into a 8"x12" inch rectangle (about 1/4 inch thick).  Carefully spread spinach mixture on top. Fold two sides in (like french doors) and fold over so you form a loaf.  Slice into desired shapes (rustic triangles) and place on parchment paper or greased non-stick cookie sheet.

Bake for 10-12 minutes or until golden brown.  Serve immediately or at room temperature.  Store unused scones in fridge in airtight container and reheat in oven or toaster oven.  Enjoy!


5.15.2013

Rosemary Garlic Pita Chips

This recipe can be as easy or as complicated as you like depending on how much time you have to prepare these.  By this I mean you can whip them up in a flash using store bought pita pockets (white or wheat) or take the long route (like I did) and make them from pita pockets you have made from scratch.

They are better than store bought pita chips because you can control your seasoning level and you know what it is them.

Rosemary Garlic Pita Chips
6-8 Pita Pockets (sliced into desired size)
Generous drizzle of Olive Oil (or preferred oil)
2 Sprigs Fresh Rosemary (stems removed)
2-4 Cloves Fresh Garlic (crushed)
Salt and Pepper To Taste

In a large bowl drizzle pita pieces with oil and sprinkle with garlic and spices.  Toss to ensure mixture is well coated.  I like to use my hands to do this as it is the best kitchen tool I have.  Distribute pita into one even layer on a cookie sheet (use parchment paper for easy clean up) and bake for 15-20 minutes or until golden brown and crisp all throughout.  Serve warm or allow to cool and store in airtight container for up to 5 days.  Pairs well with hummus and red wine.

Chef note:  If you want to be adventurous and have the time try making your own pita pockets using the following recipe:


To keep the recipe vegan, for my purposes, I substituted the honey with raw blue agave syrup and used powdered soy milk in place of the powdered milk.  I also use this recipe to make English Muffins.  It is so versatile.  Enjoy!!


4.25.2013

Pita Pockets, Pita Chips and English Muffins

I am addicted to Hummus.  I mean I literally eat it every day, multiple times a day.  It's no wonder I'm not losing any more weight!  LMAO.  Sometimes I buy it.  Trader Joe's and Sabra are two of my favorite brands.  I also love to make my own Hummus.  It's so easy.

I have been going through bags of Stacy's Naked Pita Chips way too fast.  So I decided to set out to make my own Pita Pockets that I could turn into my own Pita Chips.  I quickly did a Google search for "Authentic Pita Bread Recipe" and I found this authentic pita recipe at:

http://chefindisguise.com/2012/10/03/pita-bread-recipe-how-to-make-pita-pockets/

I substituted the dry milk with equal amounts of unsweetened soymilk and substituted honey with raw blue agave syrup.

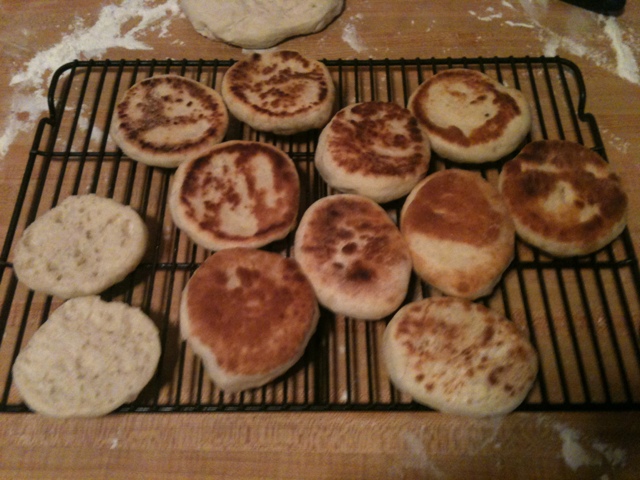
Instead of making balls to roll out, I decided just to roll out my dough and cut circles. The first batch came out exactly like English muffins.  I mean exactly!  Oh darn, I have a batch of perfect English Muffins from scratch - what's a girl to do?  I quickly grabbed my bread knife, sliced and toasted one and slathered it with coconut spread and raspberry jam.  Can you say YUM?!  And now I can use the rest of them to make little pizzas for my family.  Perfect.

The second batch I followed recipe author's instructions and got perfectly puffed pita pockets. I highly recommend you give her recipe a shot. It is so delicious and her instructions are super thorough. Thank you for your inspiration chefindisguise - keep up the great work!!